|
Blowholes
The first thing to do is to make a plan. This is probably the
most important part of your project. If your plan sucks, the
results you get will suck too. Decide witch fan brand and size
you are going to use. I always recommend getting the biggest
fan you can afford (that will fit where you want it of course).
The reason for this is that bigger fans always have better performance/noise
ratio. Once you have your fans, make sure that they will fit
where you want them. For example, if you mount them on a side
panel, make sure that you will be able to close that panel once
your modification is done. Also, keep in mind that a fan need
some place behind and in the front to breath well. If you don't
give it enough space, the fan will not work as good as it could
and you will get some additional noise. In this example, I'll
be using 120x38mm YSTech fans witch I got from Nerdsbyte.
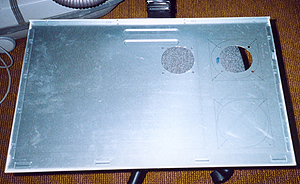
Next
thing to do is to mark your blowhole. The best way to do so
is probably to tape the fan where you want it and use it as
a stencil. If you have a chrome fan guard, it will work even
better as a stencil since it weighs less. Always work from the
inside off your case if possible and use a lead pen. That way
you can easily clean your marks once the hole is done. Here
is a picture of my side panel with all the marks done.
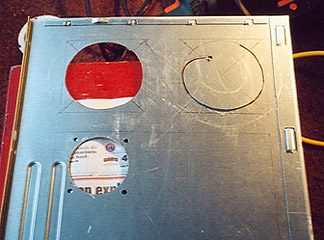
Now
comes the time to cut. A lot of people use a dremel to cut the
metal. If you do so, make sure you have a very powerful one
(30k to 35k rpm). Mine is a cheap one-which works with batteries
and only spin at 18k rpm. It would have taken me hours (and
a bunch of battery recharges) to cut these holes with my dermal
so I decided to use my good old jigsaw. Armed with a metal blade,
this thing can cut through anything. If you ask me, a whole
saw would probably give you the best results but they are pretty
expensive and you will need one for every size you need. Here
is a picture of the cutting process.
Next
>>
<<
Previous
|


