|
That's
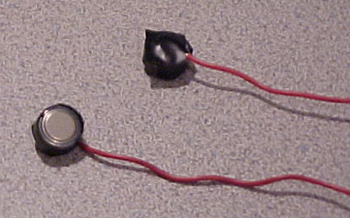
it for the CompuNurse itself. But we aren't done. The battery
needs a little modification too. Get your battery and another
piece of electrical wire; I suggest using a different color.
You have to connect the wire to the positive side of the battery.
You also have to make sure that the battery won't touch the
positive lead of the CompuNurse. That's why I surrounded the
battery with electrical tape as well.
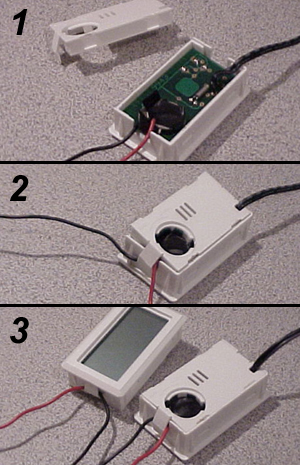
We
can now rebuild the unit. Reinstall the LCD and the circuit
board back in place. Note that you have to install the battery
BEFORE closing the back plate of the CompuNurse. Make the two
wires come out of the box on the side, under the mounting clips.
We
are almost done. Place the switch and your CompuNurse on the
5�-face plate. Now connect both batteries to one of the leads
of the switch. And as you have probably guessed, connect the
two CompuNurse to the second lead of the switch. Again, you
may want to solder the wire in place. Heatshrink also work very
well. That's it!

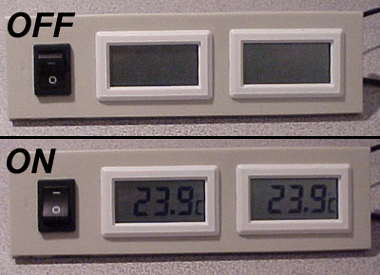
You
can now turn those little CompuNurses on or off at will. It
will also look cool as hell on the front of your case. Any
comments or questions? Send them in.
by
Jean-Chrsitophe Turcot
<<
Previous
|


